Run the Zenario installer
Point your browser at the site, for example https://zenariosite.com.
(You may need to use https://zenariosite.com/subdirectory if you run Zenario in a subdirectory).
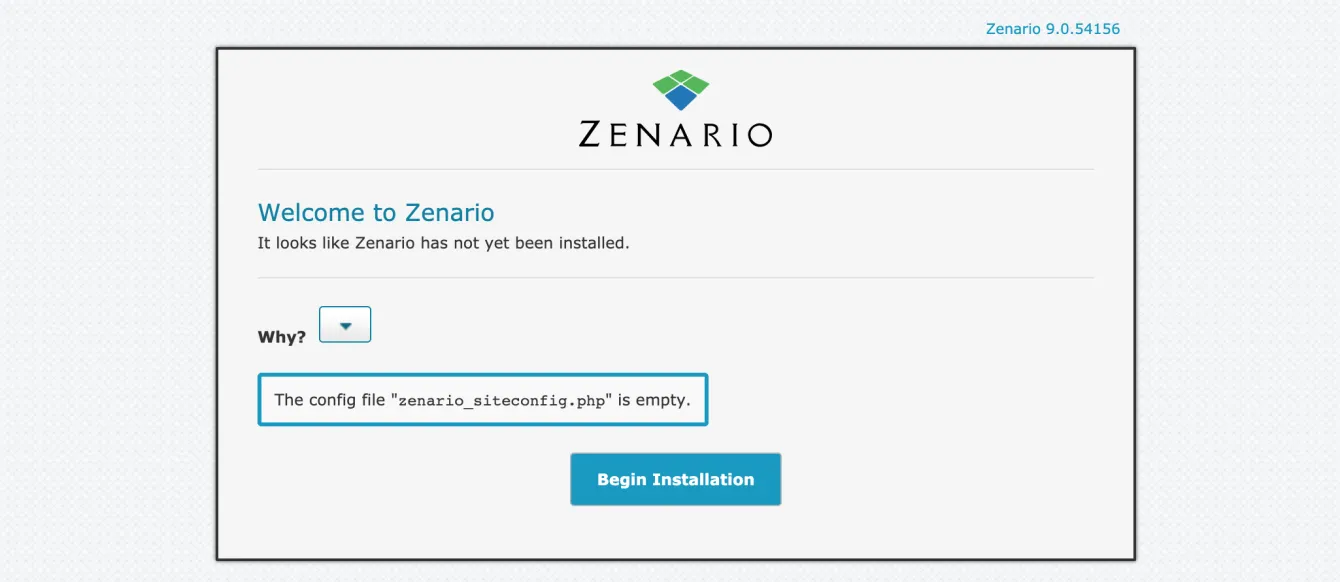
You should see the installer:
 Click "Begin" and go to the next screen:
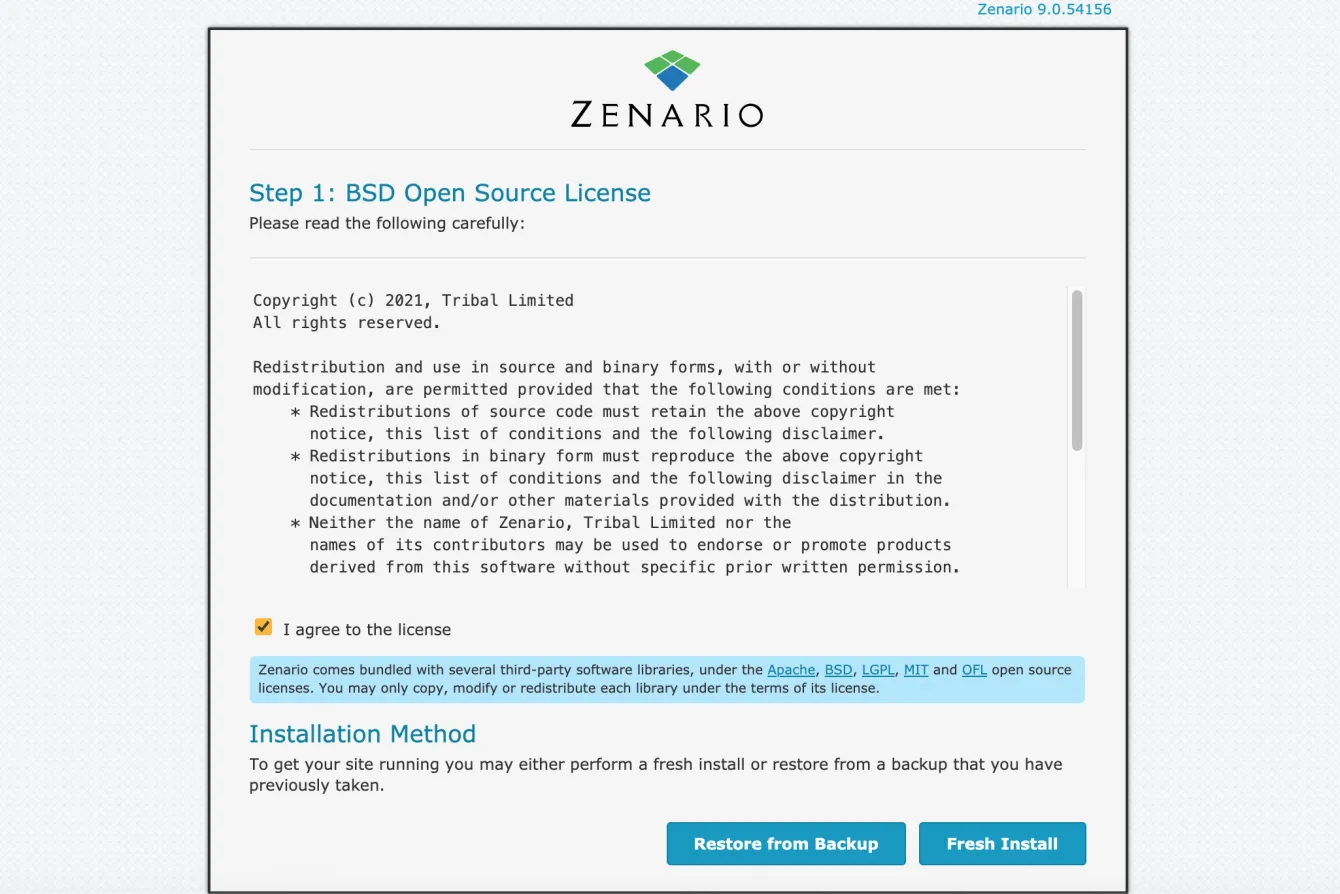 Check the license and then click "Fresh Install" to install a new site.
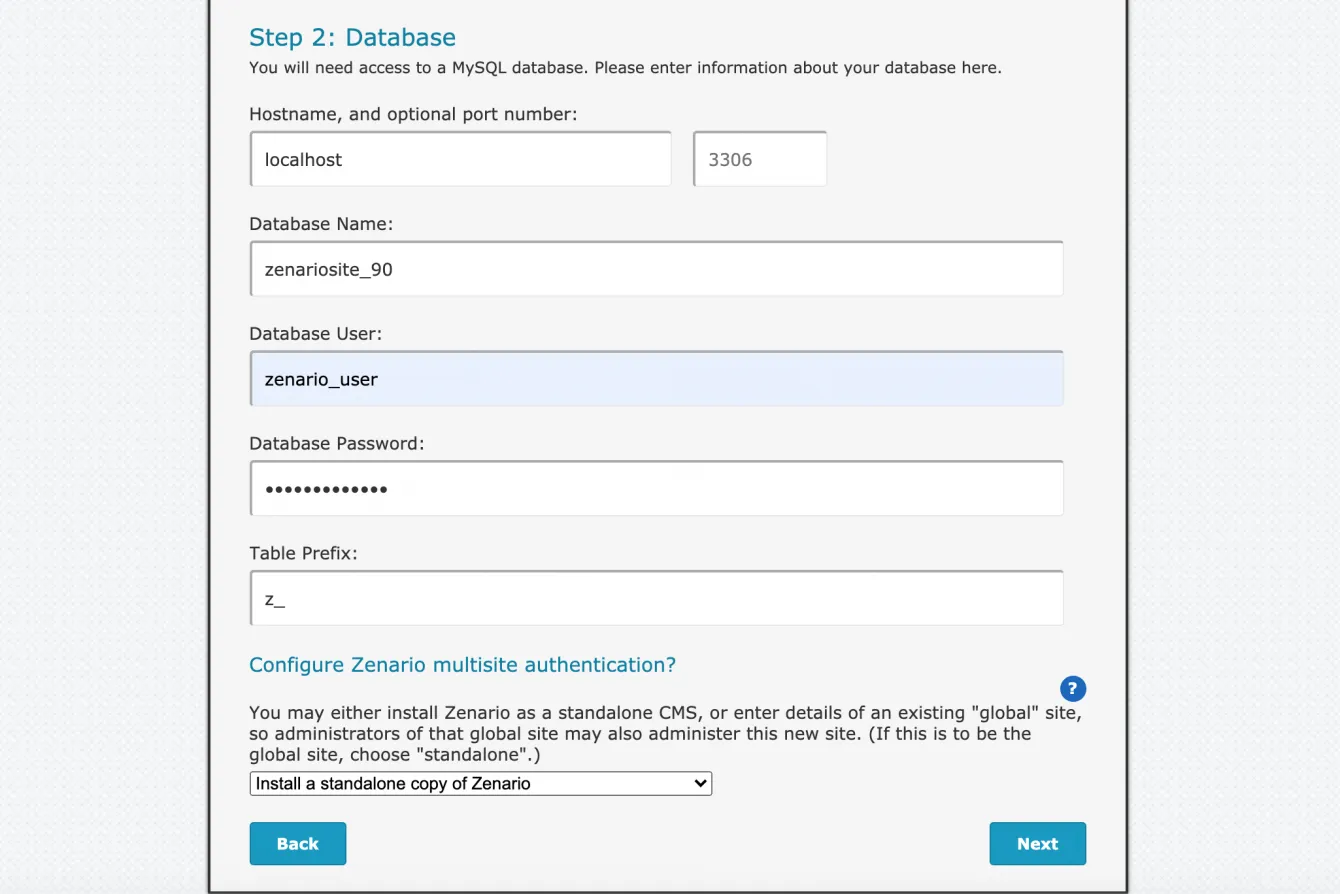
Enter your database connection details. For a simple install, choose "standalone copy of Zenario", and press "Next".
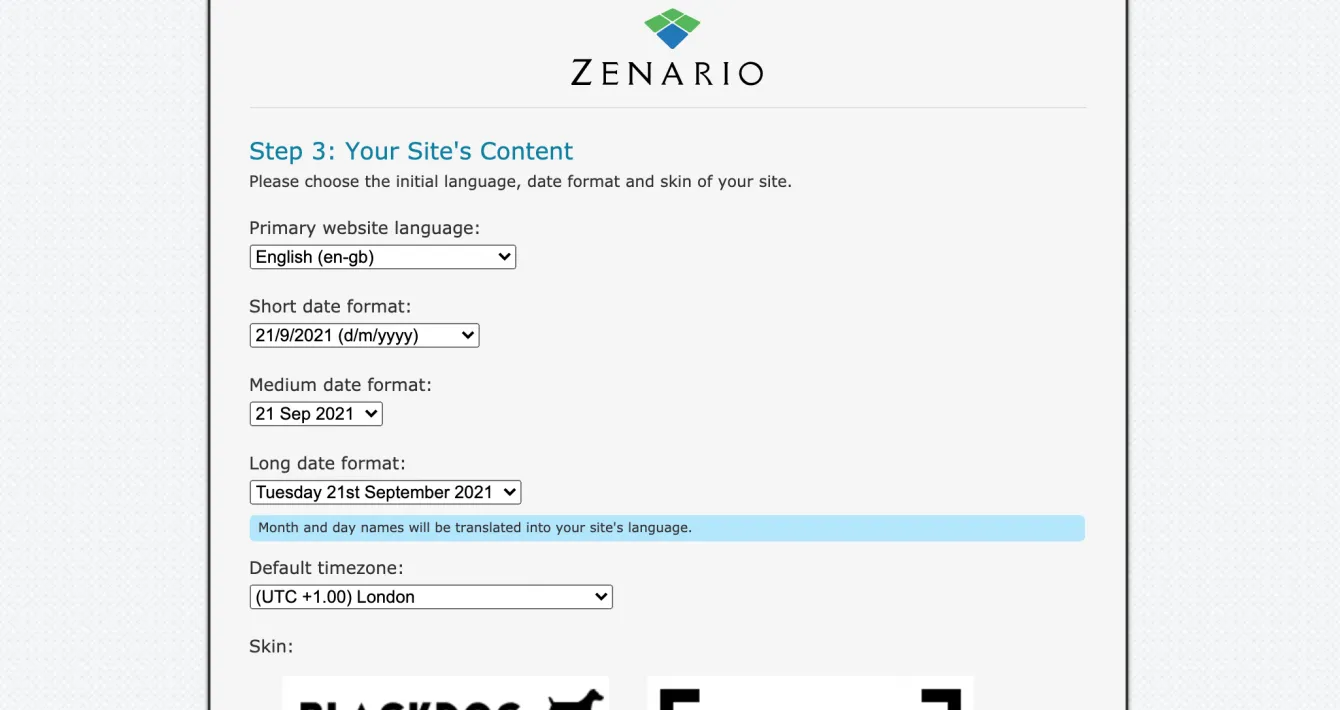 Choose the language and other settings for the site that suit you. Scroll down and pick a default skin, or "Blank" if you want to set up layouts and all CSS yourself:
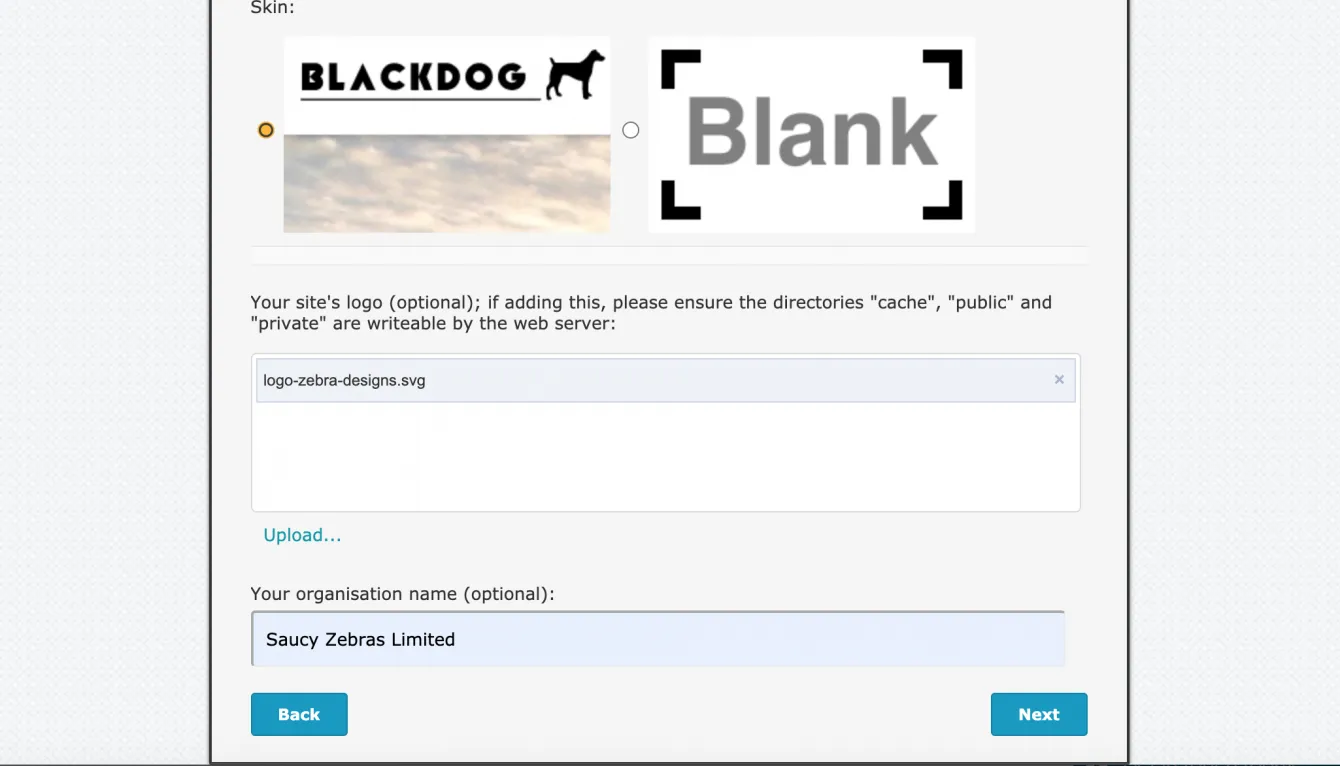
You may upload a logo (provided the listed directories are writeable), and enter an organisation name.

Enter your details and a password, so as to make your first administrator account.
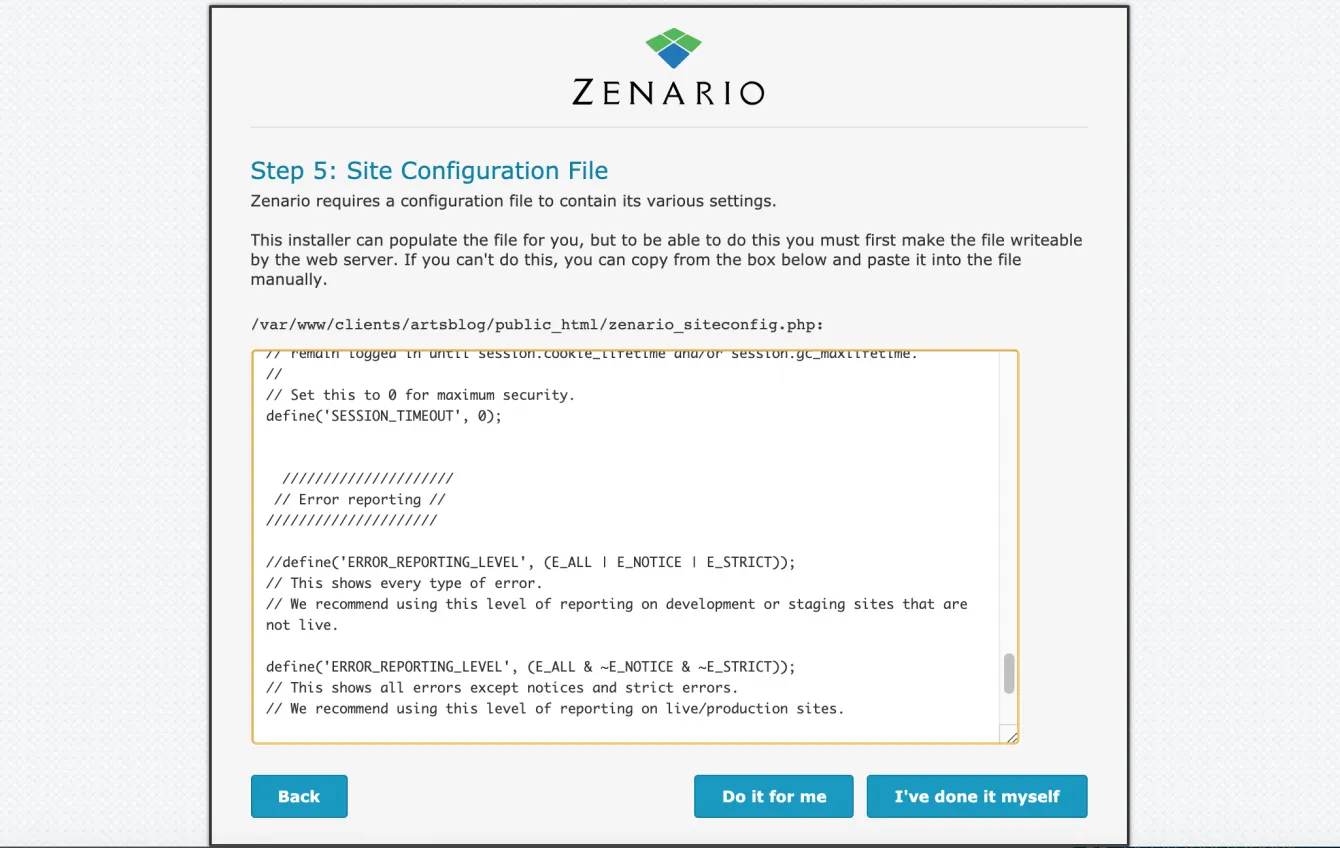
Finally you will see the zenario_siteconfig.php configuration file that Zenario needs to exist in its home folder (e.g. public_html in this example). You may either:
- If you made the file writeable during the Download step, press "Do it for me", OR
- Select the text and copy it; then edit the file on the server, paste it, and save.
Zenario will populate the database, and send an email as confirmation.
Important: Zenario needs to be able to email you successfully, so please make sure you receive this email (be sure to check your spam). If you really don't receive the email, go back and check that your server is able to send email.
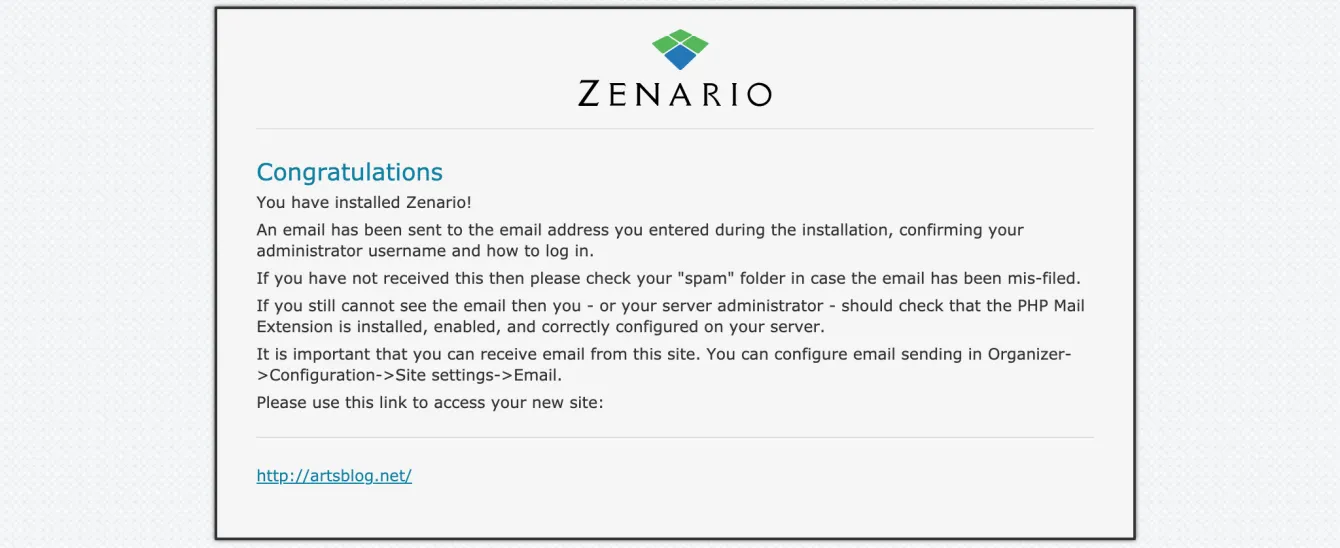 You should see the above screen, and click the link to access your site.
You should find you're logged in already, but on future visits remember to go to /admin in your URL to access admin login.